
Message List Area
Memento Application – GUI Mode – Message List Area
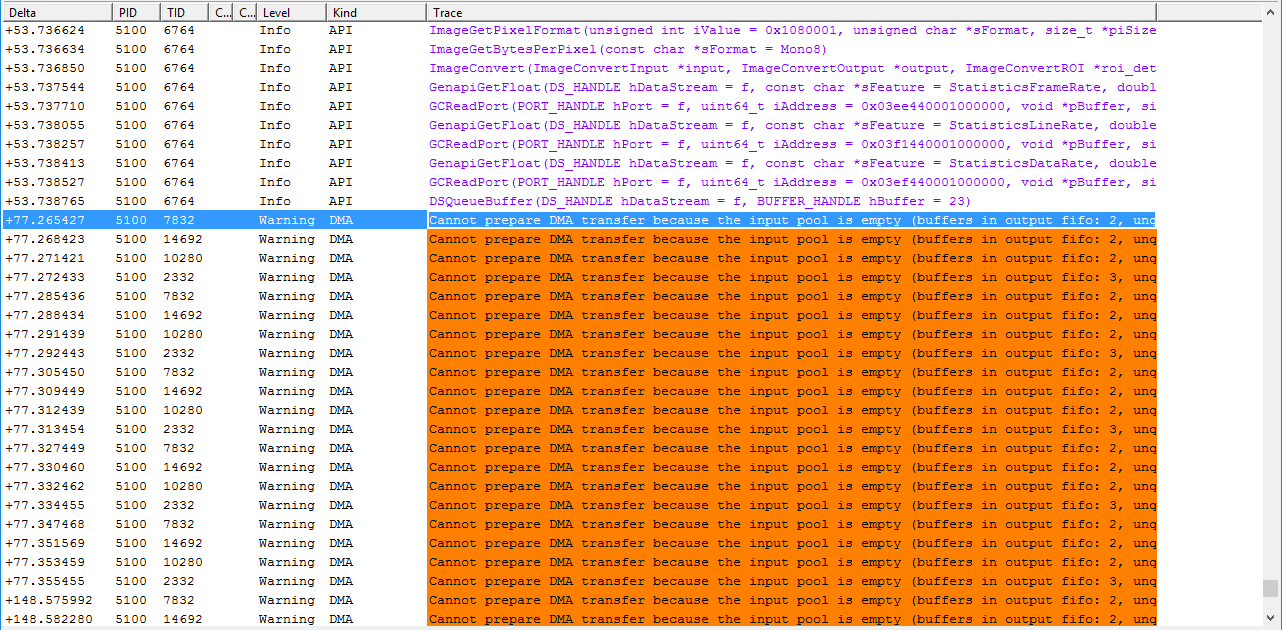
The Message List area of the Memento GUI displays a time-ordered list of a selected set of messages.
The area has a tabular structure. There is one table row per message. There is one column per message data field.
Data Fields
The following data fields area available for display into in the Message List:
| ● | Seq: the Sequential Number assigned by Memento when a message is entering the Memento Ring Buffer. |
| ● | Time: the Time attribute value assigned by the message contributor and expressed in seconds with 6 decimals. |
| ● | Delta: the time offset relative to the user-defined time reference; the value is expressed in seconds with 6 decimals. |
| ● | PID: the Process ID attribute value optionally assigned by the message contributor |
| ● | TID: theThread ID attribute value optionally assigned by the message contributor |
| ● | Card: theCard ID attribute value optionally assigned by the message contributor |
| ● | Connector: theConnector ID attribute value optionally assigned by the message contributor |
| ● | Stream: the Sream ID value optionally assigned by the message contributor |
| ● | Level: the Level attribute value assigned by the message contributor |
| ● | Kind: the Kind attribute value assigned by the message contributor |
| ● | Trace: the text of the message body |
| ● | Comment: a user-editable data field |
Data Fields Visibility Settings
The user may display or hide each data-field column separately. The dialog box opens by right-clicking on the column headers.
Note: The column order cannot be modified.
User-defined Time Reference
The user may use the time stamp of a message as the time-reference for the Delta data field.
This is achieved by right-clicking on a message to open a dialog box and then clicking on "Set time reference".
Injection of Current Time
The user may request Memento to inject a message containing the UTC time and date in the Memento Ring.
This provides a sync point between the Memento time scale and the System time, itself possibly synchronized to an Internet Time Server.
This is achieved by right-clicking on a message to open a dialog box and then clicking on "Inject Current Time Trace".
The following pop-up menu appears when right-clicking in the message list:
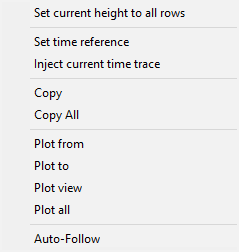
Memento Application – GUI Mode – Message List Area Pop-up Menu
Possible actions are:
Row resizing
To resize rows:
| 1. | Select a row by clicking inside. |
| 2. | Adjust the row height by selecting top or bottom edge and dragging up or down the row boundary. |
| 3. | Click on "Set current height to all rows" to uniformize the row height. |
Set time reference
To define the time reference for the time shown in the "delta" column of the message list:
| 1. | Select a row by clicking inside. |
| 2. | Click on "Set time reference". |
Inject current time trace
| ● | Click on "Inject current time trace" insert a "UTC Time message" level in the Memento Ring. |
Copy to clipboard
To copy a selection of messages to the clipboard:
| 1. | Select one message using the left click. |
| 2. | Optionally, select more messages using the shift-left click or the shit-right click. |
| 3. | Click on "Copy". |
To copy all messages of the viewer buffer to the clipboard:
| ● | Click on "Copy all". |
Plot From | Plot To | View |All
To plot a set a messages in the message plot area:
| 1. | Select the first message using the left click. |
| 2. | Click on "Plot from". |
| 3. | Select the last message using the left click. |
| 4. | Click on "Plot to". |
The message plot area is resized to fit the messages set. The first message appears on the left-side and the last message appears on the right-side of the message plot area.
To plot the messages that are currently displayed in the Message List:
| ● | Click on "Plot View". |
To plot the messages that are stored in the Viewer Buffer:
| ● | Click on "Plot All". |
Auto-Follow | No Auto-Follow
To adjust automatically the left- and right-limits of the Message Plot to follow the arrival of new messages:
| ● | Click on "Auto-Follow". |
To stop the automatic adjustment:
| ● | Click on "No Auto-Follow". |